Master Page in Print Shop
Master page in print shop is a feature which can make your work and life easier. It can help you save time and money with wonderful design experience. Either you are a professional businessman or a school teacher or use print shop for your own personal designs, Master page’s option is all what you need for large number of prints.
It reduces your work load and you can design large number of templates in one go by designing master page and all other work is duplicated on number of pages you want. As holiday season is ahead and consider you are a teacher and want to give some greeting cards saying “Happy Holidays” to your students, Master page will do your work like a magical wand. The changes you will make on master page will automatically be shown on your pages. With this you can design large number of templates in a matter of minutes!
Now, let us help you use master page with easiest steps.
Master page feature is available in only professional variant, not in Deluxe
Add a Master Page to your Project
1. Launch The Print Shop
2. Create a Blank or Ready-Made Template Project.
3. Locate the Page Preview feature in the bottom area of the design desk.
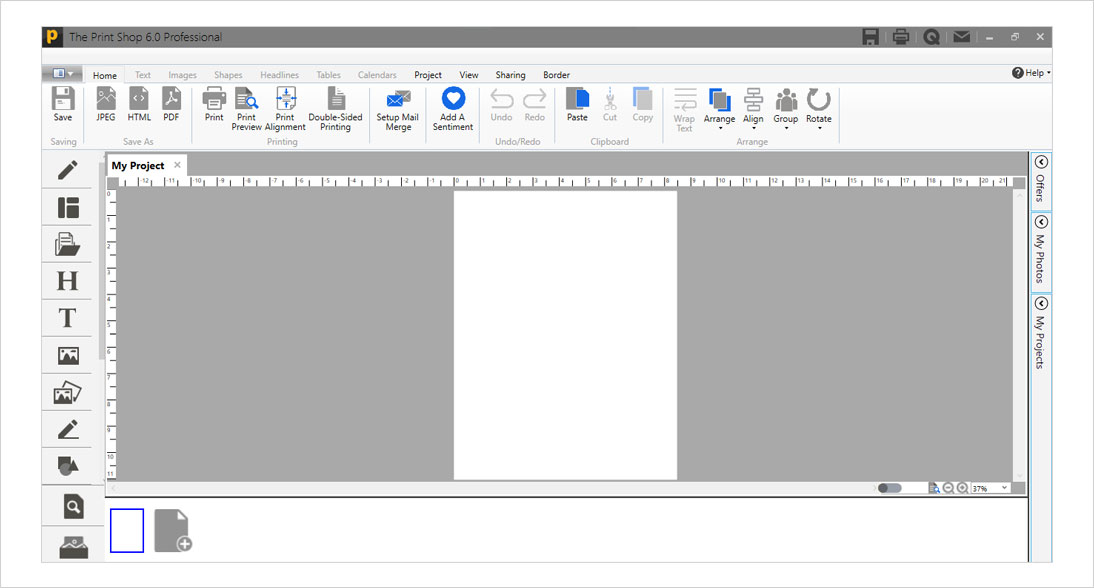
4. Notice the total number of pages available in your project. Add a few more pages by clicking the add page feature.
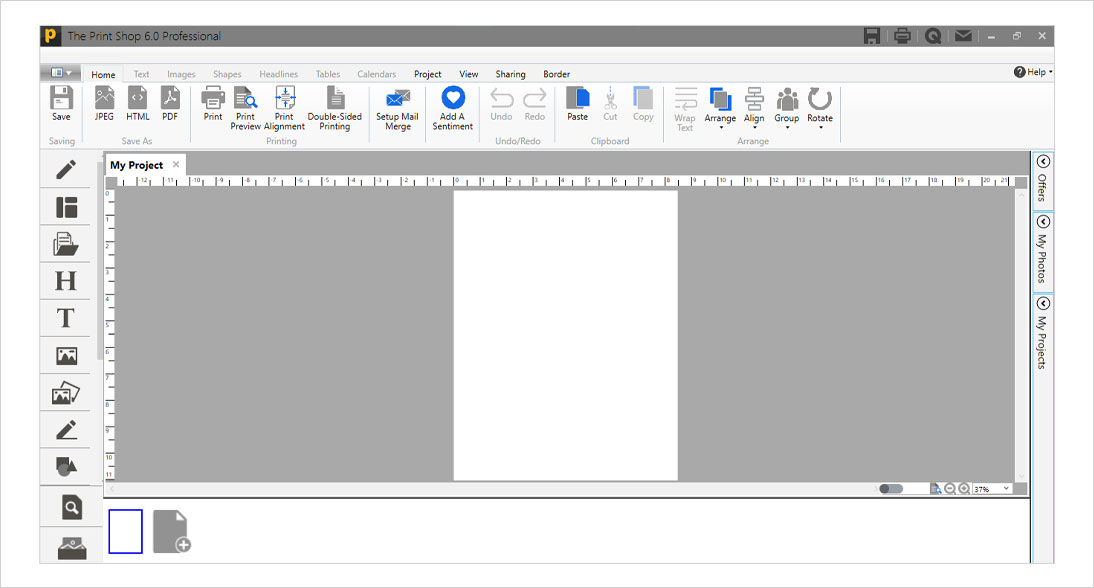
5. In The Print Shop ribbon, select the Project tab and click the Add Page feature. From the list of options, choose Master Page
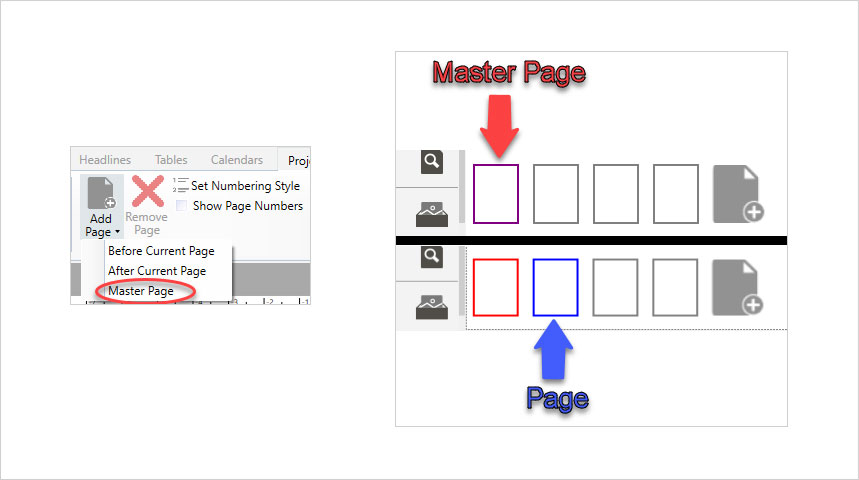
6. The Master Page is immediately added to the Page Preview. The Master Page is outlined with a magenta color when selected, the other pages are outlined with blue when selected. These colors help you differentiate which pages are selected. When the Master Page is not selected, the color outline becomes red.
7. Select the Master Page and add a few objects to your project
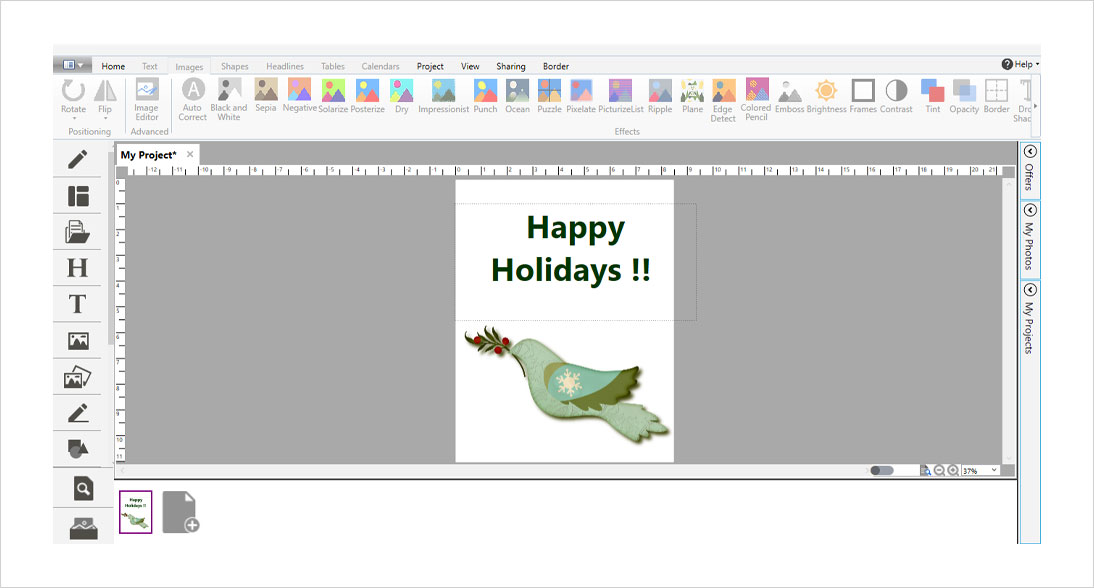
8. Return to the Page Preview and confirm that your Master Page is still selected. Now, select one of the pages to transfer the design from your Master Page.
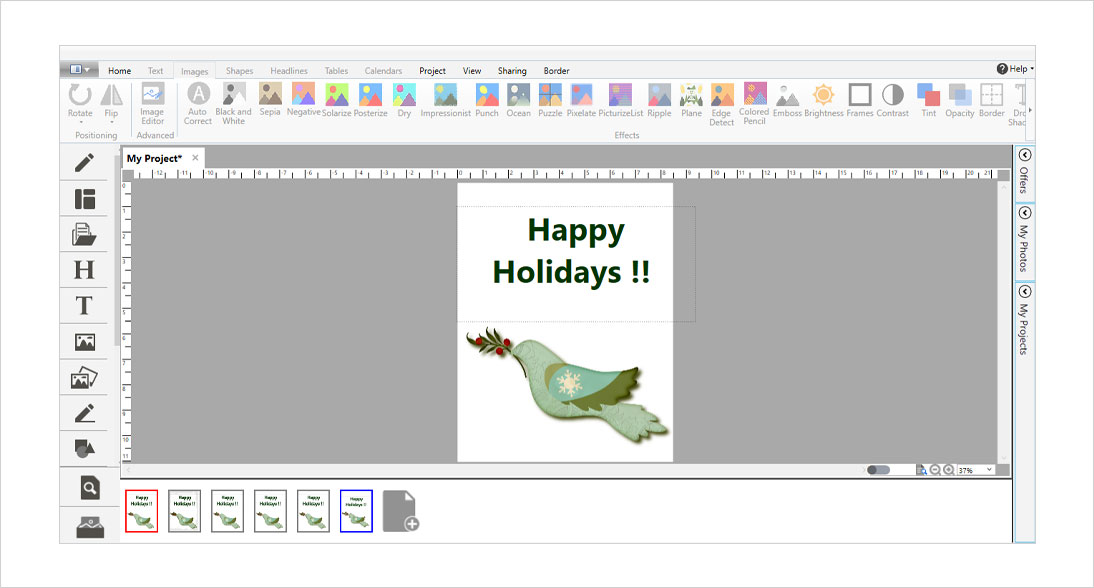
And Within a matter of time you can create a large number of ready-made templates to be printed.


