Creating Custom Borders in The Print Shop

You may have seen fancy photo art on photos from your friends or you may have seen fancy photo frames in the store… So, the question is, how do I get those fancy sort of elements created in Print Shop? It’s very easy to do! Start a Project first, preferably an 8x5 by 11 or similar-sized one.
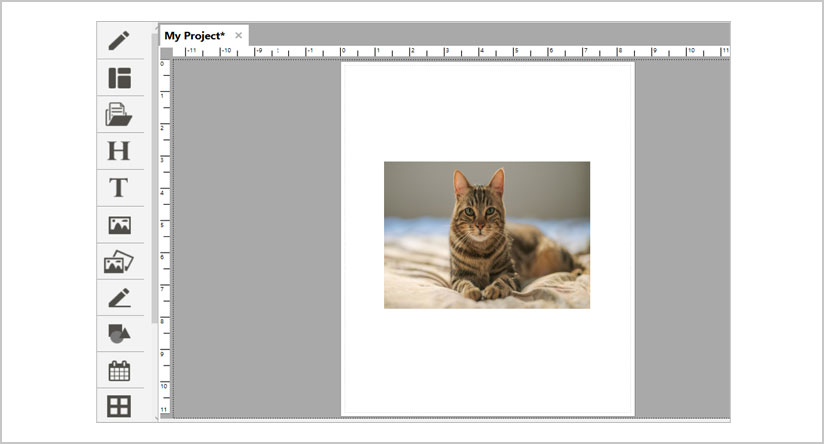
First, determine which photo you want to use. Use the photo import button to do it.

Next, choose the photo you’re looking for.
Clicking the import button will allow you to choose a photo from your computer. In this example I have a picture of a cat
Now your photo is on the canvas! Adjust the size as needed and adjust any photo editing attributes you need in order to make your image looking its best.
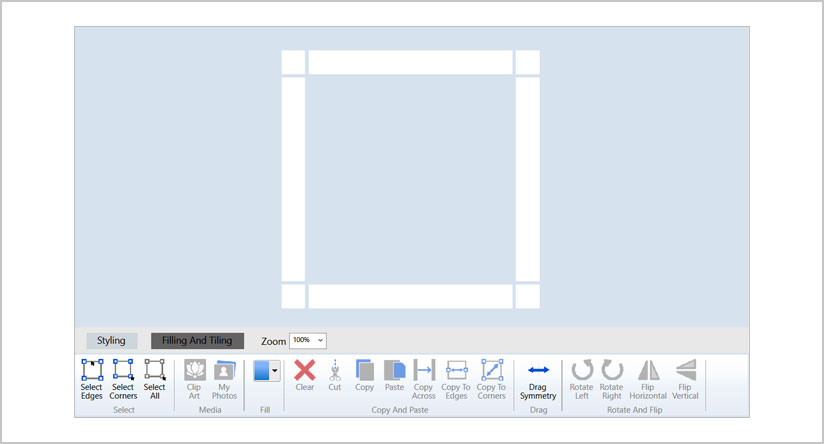
Now you’re ready to design a border! From the last tab at the top of your menu, click on Border, and then custom border.
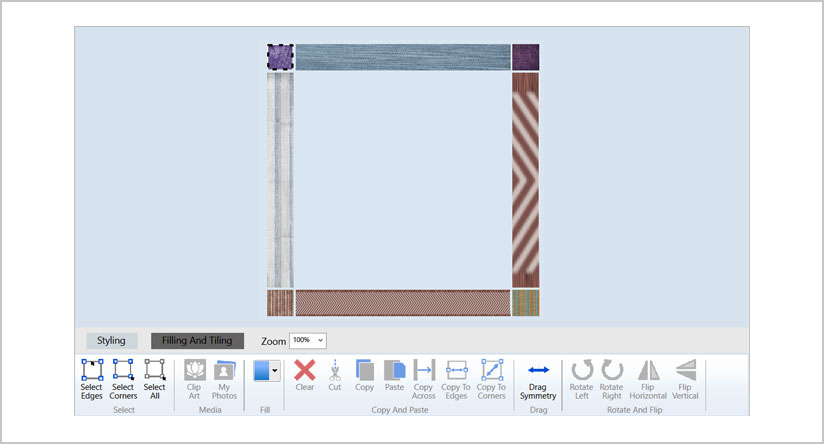
As you can see here, we have a variety of choices for you to customize your border. I used the clip art to fill in the borders. You can use the options to adjust your preferences according to how you want the border to look.
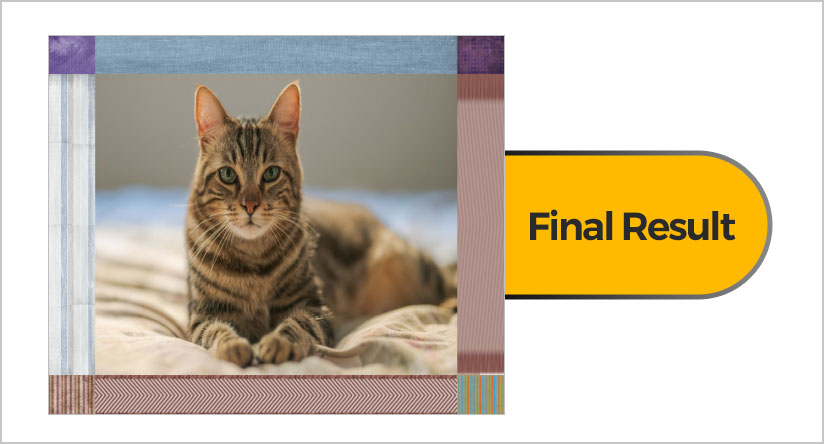
Now you’re ready to transfer it to your picture! And then the final result
You can adjust the borders as you can with the picture to size up to match the frame. Be sure to use glossy photo paper for optimal results when printing. This will will give a more professional lookto yi=our image, , similar to what you get when using photo services at popular stores.
And that’s all there is to it! With so many custom options and the ability to use your own designs, this makes using Print Shop 6.0 ideal for all types of projects.
About the Author


A big thank you to our loyal Broderbund Customers!
May 27, 2021

The Print Shop 6.0 Tips & Tricks By Jason Carver
August 4, 2020

ENHANCING YOUR PROJECTS WITH CREATIVITY AND ROYALTY-FREE COLLECTIONS
September 5, 2020

PRINT SHOP IMPROVEMENTS!
September 20, 2022

How to use Mail Merge and Address Book in Print Shop!
December 2, 2021
PRINT SHOP IMPROVEMENTS!
September 20, 2022

Sweet Valentines memories - By Jason Carver
February 14, 2022
How to use Mail Merge and Address Book in Print Shop!
January 31, 2022

Print Master Platinum v9 gives you a whole new design experience!’
January 18, 2022